The LogProduct
Passage Planning Checklist for Navigators: Berth to Berth
Ensure safe navigation with a comprehensive passage planning checklist. Follow the IMO stages for effective berth-to-berth planning.

A compliant berth-to-berth passage plan follows the four stages defined in IMO Resolution A.893(21) — Appraisal, Planning, Execution, and Monitoring — and is documented with Master approval as required by SOLAS Chapter V Regulation 34. That legal baseline is non-negotiable. What separates a plan that survives a PSC inspection from one that doesn’t is the quality of the checklist behind it: specific, grouped by stage, and signed before departure.
Before you plot a single waypoint, tick these four items on the bridge:
- Verify charts and ENCs. Confirm coverage, latest Notices to Mariners, and that ENC permits are current and loaded in the ECDIS catalogue.
- Set ECDIS safety settings and save the route to backup. Safety contour, safety depth, XTD, and off-course alarm must be configured before the route is saved to the secondary ECDIS or paper backup.
- Calculate UKC and tidal windows. Apply company UKC policy, squat allowance, and tidal height at the shallowest point on the intended track.
- Brief the bridge team and obtain Master approval. The ICS Bridge Procedures Guide C2 checklists require a signed passage plan before departure; the briefing and signature block close the compliance loop.
Nausika can serve as a real-time data source during Appraisal and Execution, feeding live tide, current, and weather routing signals into the plan without replacing any of the above obligations.
Key Takeaways
A compliant berth-to-berth passage plan requires verified charts, configured ECDIS safety settings, Master approval, redundant position fixing underway, and explicit contingency marks — all documented and retained per company SMS.
| Point | Details |
|---|---|
| Four IMO stages are mandatory | Every passage plan must follow Appraisal, Planning, Execution, and Monitoring per IMO guidelines. |
| ECDIS settings and backup are audit priorities | Set safety contour, XTD, and off-course alarm; save the route to the secondary system before departure. |
| Master approval closes the compliance loop | The ICS C2 checklist requires a signed passage plan and a bridge team briefing before sailing. |
| Redundant fixes protect constrained waters | Use parallel indexing and at least two independent position methods in channels and tidal gates. |
| Nausika adds a live data layer | Nausika delivers validated real-time tide, current, and weather routing data to strengthen Appraisal and Execution decisions. |
Table of Contents
- What does a passage planning checklist cover?
- Appraisal: what to gather before you plot anything
- Planning the route: waypoints, safety settings, and contingencies
- How do you monitor and update a passage plan underway?
- Pre-departure and pre-arrival checks: the C2.6/C2.7 framework
- ECDIS checks: what the bridge must do before using it as the primary system
- Special considerations that change your planning choices
- How does validated real-time data improve a passage plan?
- Nausika gives your passage plan a live data layer
- Sources
What does a passage planning checklist cover?
A bridge-ready voyage planning checklist groups every required action by the four IMO stages. The table below is a printable template; adapt it to your company SMS and vessel type. Retain completed copies per company record-keeping requirements.
Voyage Header
Stage 1 — Appraisal
- Chart catalogue checked; all required charts and ENCs identified
- Notices to Mariners applied; corrections logged
- Sailing Directions and Ocean Passages of the World consulted
- Admiralty List of Lights and List of Radio Signals current
- Tide tables and tidal stream atlases obtained for all tidal gates
- NAVAREA/MSI/NAVTEX warnings reviewed and noted
- Vessel draught, air draught, and cargo constraints confirmed
- Company SMS and shore review requirements checked
Stage 2 — Planning
- Route plotted berth to berth on appropriate scale charts/ECDIS
- Wheel-over points, turn radii, and abort/commit points marked
- Safety contour, safety depth, and XTD set in ECDIS
- UKC calculated at shallowest point; squat allowance applied
- Contingency anchorages and ports of refuge identified
- WPT log completed (distance, CTS, hazards, ETA per leg)
- Route saved to secondary ECDIS or paper backup
- Master review and sign-off obtained
Stage 3 — Execution
- Bridge team briefed on plan, critical waypoints, and abort points
- Position fixing method and interval agreed and logged
- Parallel indexing set up for constrained waters
- Echo sounder, gyro, and magnetic compass checked
- VTS/pilot exchange information confirmed
- Manual steering tested
Stage 4 — Monitoring
- Position fixes logged at agreed intervals; deviations recorded
- Plan amendments approved by Master and noted in plan
- Secondary ECDIS/backup updated after any route change
- Off-course and XTD alarms active throughout
Signature Block
Record retention: file completed passage plans per company SMS. Most SMS policies require retention for at least 12 months; confirm your company’s requirement. This template is a baseline — adapt it to vessel type, trade area, and any special route requirements.
Pro Tip: Print this checklist and keep it on the bridge alongside the passage plan. For ECDIS-primary vessels, save a PDF copy to the ECDIS notes folder and ensure the secondary system holds the same version.
Appraisal: what to gather before you plot anything
The appraisal stage is where most planning errors originate. Navigators who skip straight to plotting often discover mid-passage that a chart is uncorrected, a tidal gate was missed, or a NAVAREA warning affects the intended track. Skuld’s passage planning guidance notes that a thorough appraisal gathers around fifty elements before a single waypoint is set.
Publications and chart data
- Chart catalogue: identify every chart required from berth to berth, including pilotage waters
- ENCs: verify coverage, permits/licenses, and that the ECDIS catalogue shows the latest update date
- Paper charts (NP/Admiralty): confirm corrections are current; note chart datum (WGS-84 required for ECDIS/GPS alignment)
- Notices to Mariners: apply all outstanding corrections; log NtM numbers that affect the voyage
- Admiralty Sailing Directions: read the relevant volume for port approaches, hazards, and local cautions
- Ocean Passages of the World: consult for ocean passages; note recommended tracks and seasonal routing advice
- Admiralty List of Lights: verify light characteristics at key waypoints and approaches
- Admiralty List of Radio Signals: confirm VTS frequencies, pilot channels, and port radio contacts
- Tide tables and tidal stream atlases: extract heights and streams at every tidal gate and shallow crossing
- NAVAREA/MSI/NAVTEX: download current warnings and note any that affect the planned track
Vessel and operational data
- Draught (fore, aft, maximum) and air draught
- Cargo stowage restrictions or stability constraints that affect speed or routing
- Propulsion and steering status; any defects logged in the deck log
- Company SMS requirements: does the plan need shore review before departure?
- Bunker state and fuel changeover requirements for ECA entry
Pro Tip: Order missing charts or ENC licenses at least 48 hours before departure. For short-notice sailings, prioritize the harbor approach charts and the first coastal leg — these carry the highest risk density. Log every NtM that affects the voyage in the passage plan record, not just on the chart.
Planning the route: waypoints, safety settings, and contingencies
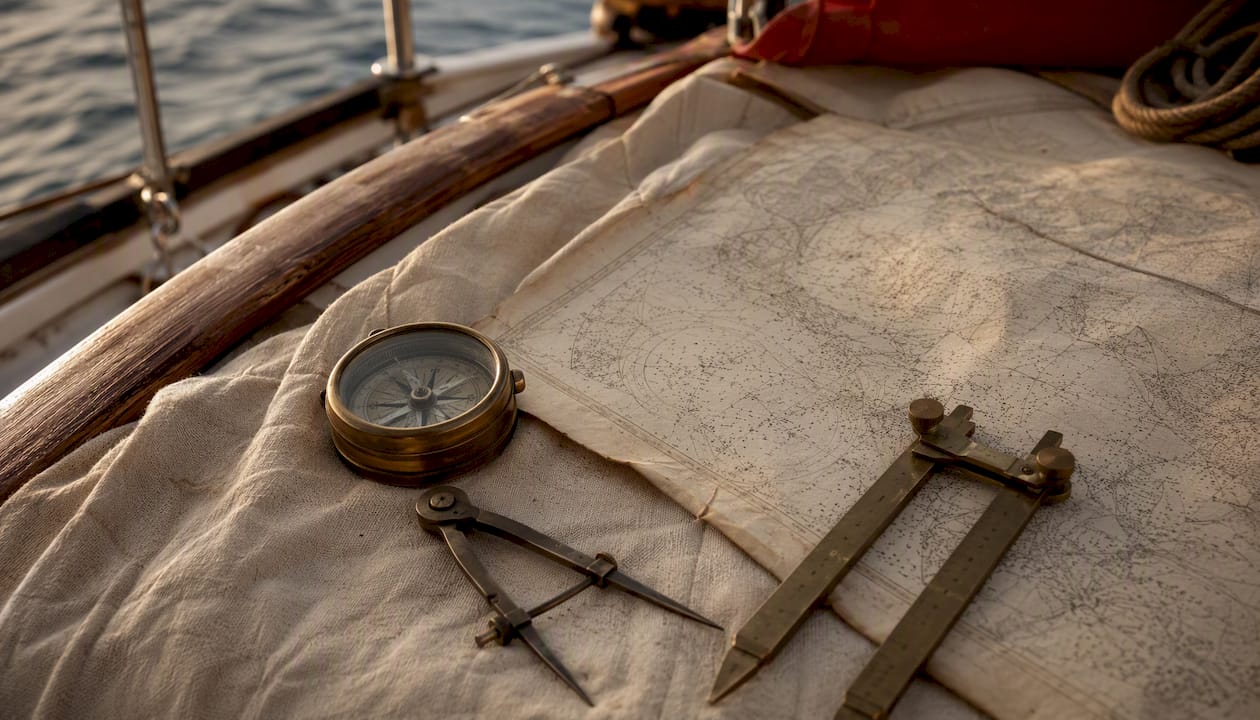
Once appraisal is complete, the planning stage converts gathered data into a plotted, auditable route. MarineInsight’s passage planning guide describes the step-by-step transfer from small-scale planning charts to larger-scale coastal and harbor charts, with explicit marking of no-go areas, wheel-over points, and contingency tracks.
Plotting conventions
- Plot the route berth to berth, starting on the smallest-scale chart that shows the full passage
- Transfer the route to progressively larger-scale charts for coastal and harbor approaches
- Mark no-go areas with hatching or a clear visual boundary
- Place wheel-over points at every significant turn; note the turn radius and speed
- Mark abort/commit points before every critical area (narrow channel, tidal gate, pilotage waters)
- Add parallel index lines for constrained waters; note the PI distance and reference object
ECDIS safety settings
- Safety contour: set to the vessel’s draught plus UKC margin plus squat allowance
- Safety depth: set to the same value as the safety contour or per company policy
- XTD (cross-track distance): set to a value that reflects the navigable width of the channel
- Off-course alarm: configure to trigger before the vessel reaches the XTD limit
- Echo sounder: set DBS/Nav alarm to the safety depth value
WPT-to-WPT record (minimum fields per leg)
- WPT ID and position (Lat/Lon)
- Course to steer (CTS) and distance to run
- Hazards and no-go areas on that leg
- Visual fix or clearing bearing available
- ETA at next WPT
- Tidal gate or tidal window (if applicable)
- Abort/commit point before the next critical area
Contingency planning
- Identify at least one emergency anchorage per coastal leg
- Note ports of refuge with entry conditions (draught, tide, VHF channel)
- Record the abort point for each critical area and the action to take if the abort is triggered
- Document how plan amendments will be approved and recorded underway
Step-by-step route transfer sequence
- Plot the full passage on the smallest-scale chart covering the entire route.
- Identify all critical areas and tidal gates on the small-scale chart.
- Transfer waypoints to the relevant large-scale coastal charts; verify positions agree.
- Transfer harbor approach waypoints to the largest-scale chart available.
- Load the route into the primary ECDIS; verify each WPT position against the paper chart.
- Set all safety settings (contour, depth, XTD, alarms) in ECDIS.
- Save the completed route to the secondary ECDIS or backup system.
- Record the route name, date saved, and officer’s name in the passage plan log.
How do you monitor and update a passage plan underway?
IMO Resolution A.893(21) deliberately separated Execution from Monitoring to signal that the passage plan is a living document. A plan that isn’t actively used and amended when conditions change is not compliant, regardless of how well it was prepared.
Position fixing and monitoring
- Fix the vessel’s position at intervals agreed during the pre-departure briefing; log each fix
- Use at least two independent methods simultaneously: GPS cross-checked with radar ranges or visual bearings
- In constrained waters, increase fixing frequency and use parallel indexing as the primary monitoring tool
- Use clearing bearings to confirm the vessel remains clear of hazards between fixes
- Echo sounder readings should be compared against charted depths at each fix
Logging deviations and amendments
- Record every deviation from the planned track in the deck log, noting time, position, reason, and action taken
- Any amendment to the passage plan requires Master approval; note the approval in the plan and the deck log
- After an amendment, update the route in the primary ECDIS and save the revised route to the secondary system
- Brief the oncoming watch on any changes before handover
ECDIS route monitoring
- Confirm the off-course and XTD alarms remain active throughout the passage
- Check that the secondary ECDIS or paper backup holds the current route version after any amendment
- Review MSI/NAVTEX messages at regular intervals; note any new warnings that affect the track
Pro Tip: In constrained waters, rely on parallel indexing rather than GPS alone. A radar-derived PI line gives you a real-time, independent check of your track that doesn’t depend on GPS integrity. When equipment reliability is reduced — a degraded gyro, a suspect GPS fix — increase your fixing frequency and revert to visual and radar methods until confidence is restored.
Pre-departure and pre-arrival checks: the C2.6/C2.7 framework
The ICS Bridge Procedures Guide C2 checklists provide the industry-standard tick items for pre-departure (C2.6) and pre-arrival (C2.7) checks. These are the items PSC inspectors and company auditors look for first.
Pre-departure checklist (C2.6 style)
- Route plotted on up-to-date charts/ENCs, berth to berth
- Passage plan checked and approved by Master; signature obtained
- Passage plan briefed to all bridge team members on watch
- ECDIS terminals configured; safety settings verified
- Route loaded on primary ECDIS; saved to secondary ECDIS/backup
- Echo sounder operational; alarm set to safety depth
- Gyro and magnetic compass checked and errors noted
- Engines tested ahead and astern; ready for sea confirmed
- Manual steering tested; helmsman available
- VTS notification sent (if required); pilot exchange details confirmed
Pre-arrival checklist (C2.7 style)
- Pre-arrival documentation sent to port agent and authorities
- Passage plan updated for arrival leg; any amendments approved by Master
- Bridge team briefed on arrival plan, pilot boarding position, and abort points
- Pilot card prepared and available
- Port approach charts/ENCs loaded and verified on ECDIS
- Anchoring equipment ready (if required)
- VHF channels for VTS, pilot, and port radio confirmed
ICS Bridge Procedures Guide, C2 passage planning checklist: “The passage plan should be checked and approved by the master before departure. The bridge team should be briefed on the plan, including critical waypoints, abort points, and contingency arrangements. Evidence of approval and briefing should be retained with the passage plan record.”
Signature block and record retention
The completed checklist, passage plan, and signature block should be filed together. Store one copy on the bridge (passage plan folder) and one in the company SMS record system. The signature block confirms who prepared the plan, who reviewed it, and when Master approval was given. This is the primary evidence document in the event of an incident investigation.
ECDIS checks: what the bridge must do before using it as the primary system
ECDIS configuration is one of the most frequent audit findings. Documenting exactly who loaded which route and when removes ambiguity during inspections. The C2.4 familiarization checklist in the ICS Bridge Procedures Guide covers the minimum actions required.
ECDIS operational checklist
- Load existing route and enable editing
- Initiate a new route plan from the current berth position
- Add, edit, and delete waypoints; confirm positions display correctly
- Set safety contour and safety depth per company UKC policy
- Set XTD and off-course alarm values
- Display time-varying objects (tidal streams, MSI, T&P notices) if available
- Save the completed route plan with a clear naming convention (e.g., VESSEL-FROM-TO-DATE)
- Save the route to the secondary ECDIS or backup navigation system
- Confirm ENC permits and licenses are current; note expiry dates
- Verify ECDIS datum is set to WGS-84; confirm GPS receiver datum matches
Backup strategy
The secondary ECDIS must hold the same route as the primary. Where RCDS (Raster Chart Display System) is used instead of ENC, paper charts remain a mandatory backup. Even on fully ENC-equipped vessels, maintaining a set of corrected paper charts for the most critical areas of the passage is prudent practice and may be required by company SMS.
ECDIS familiarization sequence (C2.4 style)
- Confirm the officer has completed type-specific ECDIS training; check the training record.
- Walk through the route loading, editing, and saving sequence on the actual unit.
- Verify safety settings display correctly on the chart display.
- Confirm the officer can switch between primary and secondary ECDIS and transfer the route.
- Record the familiarization check in the bridge log with the officer’s name and date.
Datum and catalogue checks
WGS-84 is the required datum for ECDIS/GPS alignment. A mismatch between the ECDIS datum and the GPS receiver datum can introduce position errors that are invisible until the vessel is close to a hazard. Check both settings at the start of every passage and after any software update.
Special considerations that change your planning choices
Some voyages carry constraints that alter the checklist significantly. Ignoring them during appraisal is how compliance gaps appear.
Environmental and regulatory constraints
- ECA (Emission Control Area) entry: plan fuel changeover position and timing; log the changeover in the engine room record
- MARPOL Special Areas and PSSAs: confirm garbage, sewage, and discharge restrictions; note any routing requirements
- Ballast water exchange: identify the exchange position and confirm it meets D-1 or D-2 standards for the destination port
- Routing measures: TSS, ITZ, and recommended tracks must be followed; note any reporting obligations
Cargo and stability
- Check for special stowage restrictions (dangerous goods, heavy lifts, deck cargo) that affect stability or speed
- Confirm stability margins are within approved limits for the loaded condition and the worst anticipated sea state
- Verify load line zone compliance for the entire passage; note any zone changes and the dates they apply
Operational reliability
When propulsion or steering defects are logged, the safety margins in the passage plan must be widened. Abort points move earlier, speed is reduced, and contingency anchorages must be closer together. A vessel with reduced maneuverability should not enter a narrow channel on a single-engine approach without a tug on standby.
Medical, provisioning, and crew notifications
- For passages longer than 24 hours, confirm medical stores are adequate and the medical chest is accessible
- Note the nearest port with medical evacuation capability on each leg
- Confirm crew watch schedules are posted and rest hours comply with STCW requirements
- Log any crew notifications required by port state or flag state regulations
Pro Tip: ECA fuel changeover is a common audit finding. Mark the changeover waypoint explicitly in the passage plan, note the required lead time for the changeover, and confirm the engineer is briefed. A missed changeover in an ECA is a MARPOL violation regardless of intent.
Passage plan template: WPT-to-WPT sample fields
Copy this table into your bridge notebook or ECDIS notes folder. Adapt the fields to your vessel’s route complexity.
Passage plan header
WPT-to-WPT data table
Save this table as a PDF and store it in the ECDIS notes folder. Ensure the secondary navigation system holds the same version. For passages with more than ten waypoints, split the table into coastal and ocean legs.
How does validated real-time data improve a passage plan?
A passage plan built on static chart data and a 72-hour forecast is a good start. One that integrates validated live feeds at each stage is more resilient, particularly on passages where tidal gates, weather windows, or fuel decisions are time-sensitive.
Practical use cases by stage
- Appraisal: Pull current tide and tidal stream data for every tidal gate on the route; compare against tide tables to identify discrepancies caused by meteorological surge or river discharge.
- Planning: Use validated weather routing signals to identify the optimal departure window; adjust ETA at tidal gates accordingly and note the sensitivity of the plan to a 6-hour delay.
- Execution: Monitor live current and wind updates against the planned track; flag early when conditions diverge from the forecast used during planning.
- Monitoring: Use live MSI feeds to catch new NAVAREA warnings that affect the current leg; update the ECDIS notes and brief the watch.
Integration workflow
Before saving the final route in ECDIS, refresh the live data cache (tide, current, weather) and note the data timestamp in the passage plan record. If a live update drives a plan amendment during the passage, record the data snapshot, the decision made, and the Master’s approval in the deck log. That record is the evidence trail if the amendment is questioned later.
Compliance note
Real-time routing feeds support the Master’s decision-making. They do not transfer legal responsibility. SOLAS Chapter V Regulation 34 and IMO Resolution A.893(21) place the obligation on the Master and the vessel, not on any data provider. Every amendment driven by live data still requires Master approval and a log entry.
A service like Nausika fits here as a validated data source: it delivers real-time tide, current, and weather routing signals from verified marine datasets, reducing the uncertainty in Appraisal and Execution without adding a new system to learn. See the Nausika roadmap for the live data integrations currently in development.
The checklist works best when it’s treated as a conversation, not a form

The passage plans that hold up under scrutiny share one quality: the officer who prepared them actually used them. Not filed them. Used them.
The most effective workflow I’ve seen on a constrained coastal approach runs like this. The planner assembles charts and ENCs the evening before, sets the ECDIS safety contour to draught plus the company UKC margin, and marks the PI lines for the two tightest legs. The bridge briefing covers three things: the abort point before the channel entrance, the tidal window, and who calls the Master if the window closes. That’s it. The rest of the plan is detail that supports those three decisions.
The single-sheet summary is what makes a passage plan usable during a long watch. Pull the critical waypoints, the abort points, the tidal gates, and the contingency anchorages onto one page. Pin it above the ECDIS. The full plan stays in the folder; the single sheet is what the watchkeeper actually reads at 0300.
Nausika gives your passage plan a live data layer
The gap between a compliant passage plan and a confident one is often the quality of the data behind it. Static tide tables and a downloaded forecast get you to compliance. Validated, real-time feeds get you to the kind of plan you’d actually stake a tidal gate on.

Nausika connects directly to your existing AI assistant and delivers live tide predictions, current data, validated weather routing signals, and harbor shelter updates from verified marine sources. No new app. No separate interface. The data slots into your planning workflow at Appraisal and stays live through Execution, so when conditions shift, you’re working from current numbers rather than a forecast that’s 18 hours old.
During planning, use Nausika to confirm tidal gate windows and refine ETAs. During execution, live current updates flag early when the track needs adjustment. Every data-driven amendment gets a timestamp and a source, giving you a clean evidence trail for the deck log.
The Nausika assistant is currently in public beta with free access. Start using it on your next passage plan and see where live validated data changes your decisions.
Sources
The sources below are the primary authorities for passage planning compliance. Keep them accessible on the bridge and in the company SMS library.
- C2 Bridge Checklists
- Passage planning in a nutshell - Skuld
- Understanding the principles of passage planning - MarineInsight
Keep the IMO Resolution and the ICS Bridge Procedures Guide in the ECDIS notes folder as PDFs, alongside the completed passage plan for each voyage. During a PSC inspection, being able to produce both the plan and the regulatory authority it was built on is the fastest way to close an inspection without a deficiency.
This article provides general navigational guidance. Regulatory requirements vary by flag state, vessel type, and trade area. Confirm current SOLAS, IMO, and company SMS requirements with your flag state authority or a qualified maritime professional before relying on this material for compliance purposes.