The LogProduct
Pilotage Plan Guide for Mariners: Deck-Ready Template
Discover how to create a pilotage plan with our actionable guide. Ensure safe navigation through confined waterways with ease.
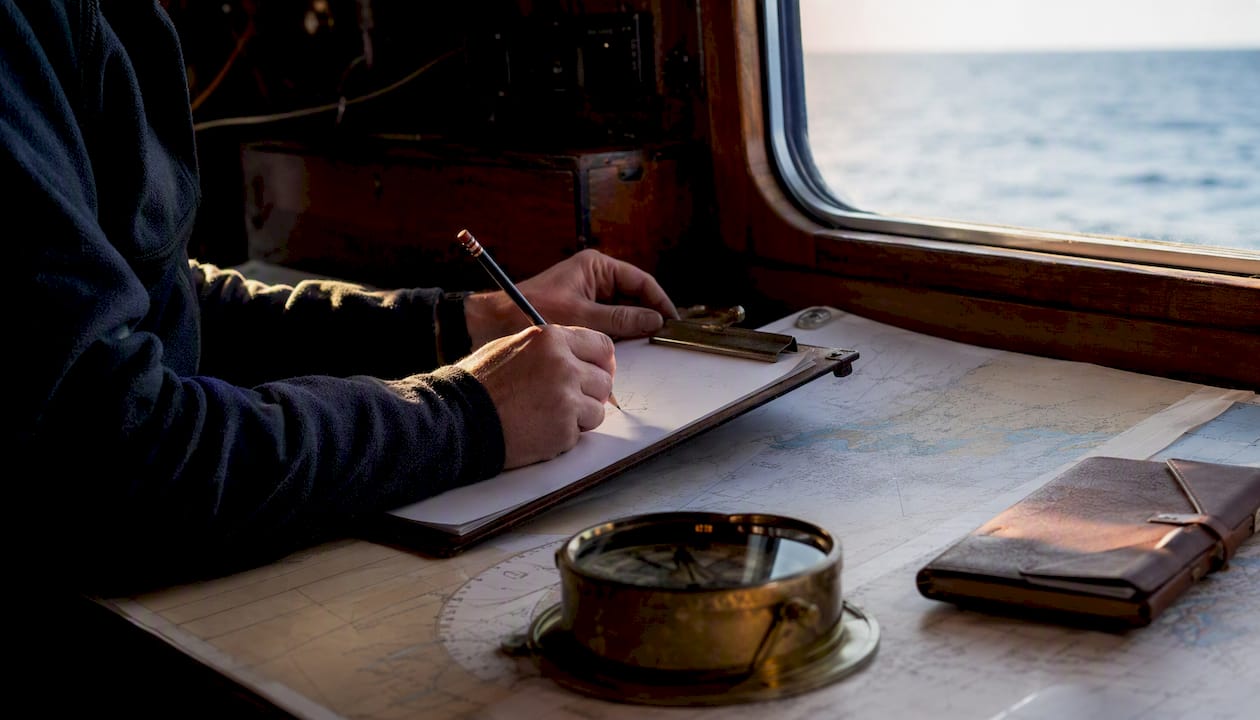
A pilotage plan is a compact, deck-level navigation brief that lists every mark, transit, bearing, tide window, depth margin, and contingency action you need to enter or leave a confined waterway safely. Before you leave the chart table, write it down on a single sheet you can read in spray and low light.
Your one-line deck checklist:
- Key marks and waypoints
- Primary and secondary transits
- Compass bearings and distances
- Tide window and predicted heights at ETA
- Minimum depth margin (draft + squat buffer + safety margin)
- Contingency options and abort points
- VHF working channel and harbor control call sign
That list fits on an index card. The discipline of filling it in before you cast off is what keeps your eyes on the water instead of the screen once you’re inside the channel.
Key Takeaways
A solid pilotage plan combines a hand-drawn sketch, pre-calculated tidal heights, at least two confirmed transits, a crew briefing, and a written abort rule before you enter any confined waterway.
| Point | Details |
|---|---|
| Write it before you leave the dock | A one-page hybrid plan with marks, bearings, tidal heights, and abort points takes 20–30 minutes and prevents on-the-water arithmetic. |
| Pre-calculate your depth margin | Add draft, squat allowance, and a safety margin to find the minimum charted depth you need at your ETA. |
| Use transits as your primary fix | Two fixed objects in line give a binary position check that works when GPS and plotters are unreliable or distracting. |
| Brief the crew before entry | State the route, key marks, abort point, VHF channel, and roles aloud so every person on deck shares the same plan. |
| Nausika validates your tidal data | Nausika connects your AI assistant to live, verified tide and current feeds, so your depth margin calculation reflects actual conditions. |
Table of Contents
- What is a pilotage plan and how does it differ from a passage plan?
- How do you create a deck-ready pilotage plan step by step?
- What tools should you carry to the bridge?
- How do transits and visual references work in practice?
- How do you calculate tide, current, and depth for U.S. waters?
- How do you execute the plan and brief the crew?
- What hazards and decision rules should you know before entering?
- A copyable one-page sample pilotage plan you can print
- How do you debrief and keep your plans current?
- Why validated real-time data makes your pilotage plan more reliable
- The mistake most mariners make with pilotage plans
- Nausika brings validated maritime data to your pilotage workflow
- Sources
What is a pilotage plan and how does it differ from a passage plan?
A pilotage plan covers the inshore, confined-water segment of a voyage: the approach to a harbor, a river transit, or a narrow channel where the consequences of a positional error are immediate. A passage plan covers the entire voyage from berth to berth, including crew welfare, fuel, weather routing, and voyage-wide contingencies.
Think of the passage plan as the strategic layer and the pilotage plan as the tactical brief for the most demanding few miles. The IMO voyage-planning guidelines (Resolution A.893) require that detailed planning include a charted route, safe speed, minimum under-keel clearance, accurate fixing points, and contingency plans, with the master approving the finished document. Those elements apply to both levels, but the pilotage plan distills them into a portable, one-page format the helmsman can read at a glance.
What belongs in the pilotage plan specifically:
- Marks, transits, and bearings for the approach
- Tidal heights and current predictions for the ETA window
- Minimum charted depth at the time of transit
- Immediate contingency options (abort point, holding anchorage, reverse transit)
- VHF channel and harbor authority contact
What stays in the passage plan rather than the pilotage brief:
- Crew watch schedules and medical notes
- Fuel and provisioning calculations
- Offshore weather routing decisions
- Voyage-wide emergency contacts
A portable, simple pilotage plan that contains key marks, bearings, distances, tide data, and contingency points is usually embedded as the final section of the larger passage plan. Keeping the two documents distinct prevents the deck sheet from becoming cluttered with information the helmsman does not need in the moment.
How do you create a deck-ready pilotage plan step by step?
This is where most mariners either over-engineer or under-prepare. The goal is a one-page reference you can produce in 20–30 minutes at the chart table and read in 20 seconds on deck.
Step 1: Appraisal
Gather your sources before you draw anything. Start with the official NOAA chart for the approach, then cross-reference the relevant U.S. Coast Pilot volume, local Notices to Mariners, and a recent pilot book if one exists. Yachting World recommends adding photographs and satellite overlays to bring the chart to life, because a photo of the harbor entrance tells you what the leading marks actually look like from seaward. Community forum notes can add useful local color, but verify them against official sources because age and accuracy vary.
Step 2: Select approach options
Identify your primary approach route and at least one alternative. Note any constraints: bridge air clearance, dredged channel width, ferry crossings, or shoal patches. PIANC harbor approach design guidelines provide accepted standards for channel dimensions and maneuvering areas, which is useful context when you are deciding whether a channel is wide enough for your vessel in the predicted current.
Step 3: Pick primary and secondary transits
Choose at least two transits or leading lines for the critical legs. A transit is two fixed objects in line: when they align, you are on the correct track. Record each transit as a compass bearing so you can check it with a hand-bearing compass if the objects are hard to distinguish at first.
Step 4: Note bearings and distances
For each waypoint, record the magnetic bearing from the previous waypoint and the distance in nautical miles. Keep distances to two decimal places for short legs.
Step 5: Calculate tide windows and depth margins
This is the calculation that saves keels. Work through it before you leave the dock (see the full worked example in the tides section below).
Step 6: Annotate contingency options
For every leg, write one abort option: where you will go if you cannot proceed. That might be a holding anchorage, a reverse transit back to open water, or a marina with enough depth to wait for the next tide.
The three layout styles
| Layout | Best for | Limitation |
|---|---|---|
| Linear list | Simple approaches with few waypoints | Hard to visualize cross-track position |
| Sketch map | Complex approaches with multiple transits | Takes longer to produce; must be legible |
| Hybrid (list + sketch) | Most coastal approaches | Requires two pages unless condensed |
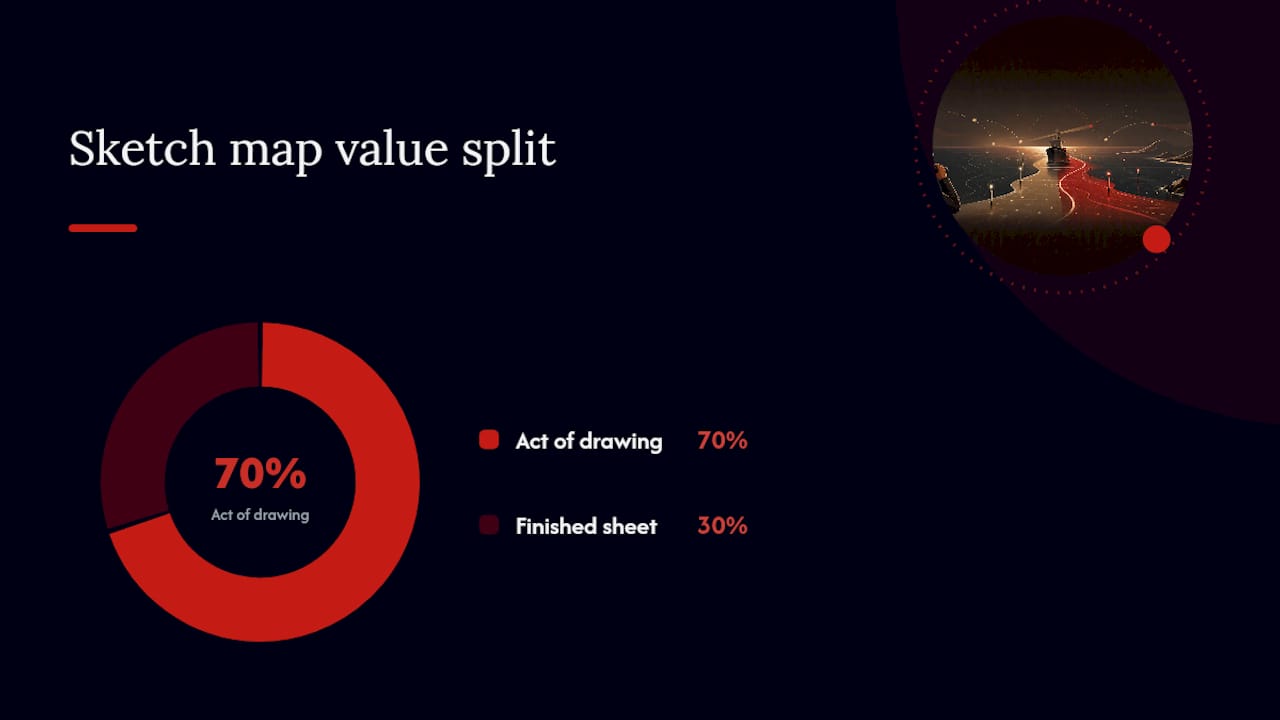
For most recreational mariners, the hybrid format works best. Yachting Monthly notes that roughly 70% of the value of a sketch map comes from the act of drawing it, not from the finished sheet, because drawing forces you to build a three-dimensional mental model of the approach before you arrive. Pre-write hourly tidal heights on the deck plan so you are not doing mental arithmetic in a cross-current.
What to pre-calculate vs. what to leave as live checks:
Pre-calculate: tidal heights at each hour of your ETA window, minimum charted depth required, squat allowance, safety margin, and ETA at each waypoint.
Leave as live checks: actual depth sounder readings, visual confirmation of each transit, and AIS traffic gaps.
What tools should you carry to the bridge?
The bridge kit for pilotage is deliberately minimal. Every item earns its place by keeping your eyes on the water.
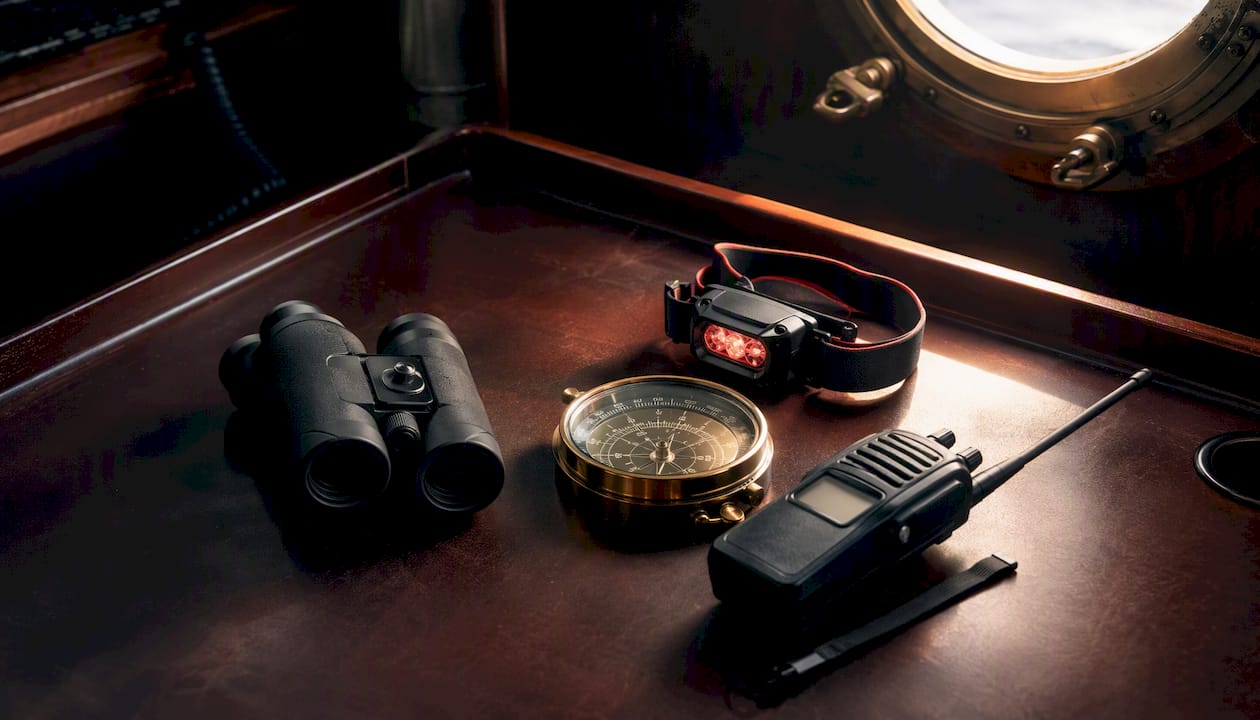
Pilotage plan (paper). The plan itself, laminated or in a waterproof sleeve, clipped where the helmsman can read it without moving. This is your primary reference.
Hand-bearing compass. Used to confirm transits and take spot bearings on shore features. A quality hand-bearing compass such as a Plastimo Iris 50 or Davis Mark 25 gives reliable readings away from the binnacle’s magnetic interference.
Binoculars. 7x50 marine binoculars with a built-in compass reticle let you identify marks at distance and take rough bearings simultaneously. Keep them around your neck, not in a locker.
VHF radio. Handheld VHF on the bridge, already tuned to the harbor working channel noted on your plan. Call harbor control before entering a commercial port.
Red headlamp. For night pilotage, a red-light headlamp preserves night vision while you read the plan.
Depth sounder display. Know where the transducer is on your hull and apply the offset to get true depth under keel. Watch the trend, not just the number.
Chartplotter (backup role only). The plotter confirms your position; it does not replace visual navigation. RYA guidance cautions that chartplotters and GPS can produce a false sense of security in narrow channels, and that electronic fixes must be cross-checked with visual bearings and transits.
Pro Tip: Set the chartplotter to display a simplified view with only the chart and your track, then turn the screen away from you slightly. Glance at it every two to three minutes to confirm position, then look back at the water. If you find yourself staring at the screen, you have lost situational awareness.
Keep the paper plan accessible at all times. Waterproof paper such as Rite in the Rain or a simple zip-lock bag costs almost nothing and survives a wave over the bow.
How do transits and visual references work in practice?
Three-dimensional thinking is the core skill in pilotage. You are not navigating a flat chart; you are moving through a space that has depth, current, and objects at varying distances. Transits and shore bearings translate that space into simple, binary checks: either the two objects are in line or they are not.
Identifying and recording transits
A transit is any two fixed objects that, when seen in line from your vessel, confirm you are on a specific track. Common examples include a church steeple over a harbor wall, a lighthouse aligned with a headland, or two leading marks installed by the port authority. Record each transit as: “Front mark: red beacon on north pier head. Rear mark: white church tower. Bearing: 047°M. Use: clears the Brewster Shoal to port.”
Yachting World’s pilotage guidance recommends using photographs alongside chart marks so you know exactly what the transit looks like from seaward before you arrive. That 30-second Google Earth check the evening before can prevent a confused approach in poor visibility.
Good transits vs. poor transits
Reliable transit references:
- Lighthouses and light structures (fixed, maintained, charted)
- Church towers, water towers, radio masts (permanent, high contrast)
- Purpose-built leading marks installed by harbor authorities
- Prominent headlands with distinctive profiles
Unreliable or poor transit references:
- Trees (seasonal foliage changes profile; trees can be felled)
- Small seasonal buoys (may be off-station or removed in winter)
- Vessels moored at a dock (they move)
- Low-contrast marks in haze or against a busy shoreline
When buoys are sparse, RYA guidance recommends following a depth contour or choosing a deliberate side of the channel, and knowing which way to turn if depth falls. That is a decision rule you can pre-write on your plan: “If depth drops below 8 ft, turn to starboard toward the main channel.”
How do you calculate tide, current, and depth for U.S. waters?
Tidal calculations are where a pilotage plan moves from a sketch to a safety document. Get them wrong and you are aground; get them right and you have a clear, timed window with margin to spare.
Where to get authoritative U.S. tidal data
Use NOAA Tides and Currents for predicted tide heights and current velocities at the nearest reference station, then apply the listed corrections for your specific location. U.S. Coast Guard Local Notices to Mariners will flag any temporary depth changes, dredging operations, or buoy discrepancies in your area.
Worked calculation example
Here is a repeatable five-step process for a small coastal cruiser with a 5-foot draft approaching a tidal inlet:
-
Distance and speed. The approach leg from the sea buoy to the marina entrance is 3.2 nautical miles. Your planned speed over ground is 5 knots. Estimated transit time: 3.2 ÷ 5 = 0.64 hours, or approximately 38 minutes.
-
ETA at the critical shoal. You depart the sea buoy at 09:00. ETA at the shallowest point of the channel: approximately 09:25.
-
Predicted tide height at ETA. From NOAA data for the reference station, predicted high water is at 10:15 with a height of 5.4 feet above MLLW. At 09:25 (50 minutes before high), the predicted height is approximately 4.8 feet above MLLW (using the rule of twelfths or the NOAA hourly table).
-
Minimum depth required. Your draft is 5.0 feet. Add a squat allowance of 0.5 feet at 5 knots in a confined channel, plus a safety margin of 1.0 foot. Minimum required depth: 5.0 + 0.5 + 1.0 = 6.5 feet.
-
Check charted depth. The charted depth at the critical point is 3.2 feet below MLLW. Add the predicted tide height: 3.2 + 4.8 = 8.0 feet of actual water at ETA. That gives you 1.5 feet of margin above your 6.5-foot requirement. Proceed, but do not slow below 4 knots or the squat calculation changes.
Safety note: The IMO voyage-planning guidelines require that minimum under-keel clearance be calculated and documented before departure. For U.S. recreational mariners, this is best practice rather than a legal mandate, but the calculation method is identical.
Tidal streams also affect your speed over ground. A 1-knot adverse current on a 3.2-mile leg adds roughly 10 minutes to your ETA, which shifts your tidal height prediction. Pre-write the hourly tidal heights for the full window on your deck plan so you can re-check without doing arithmetic underway.
Slack-water transits are worth planning for in strong-current inlets. At slack water, cross-track set drops to near zero, which simplifies track-keeping and reduces squat. NOAA current tables give predicted slack times at reference stations; apply the listed corrections for your inlet.
How do you execute the plan and brief the crew?
A plan that lives only in the navigator’s head is not a plan. The briefing converts a written document into a shared mental model.
Pre-entry crew briefing
Run through this checklist aloud before you enter the pilotage area:
- Route. Describe each leg in plain language: “We enter on the leading marks, bearing 047°M, then turn to port at the red beacon onto 092°M for the marina entrance.”
- Key marks. Point out each mark on the sketch or describe it: “The front leading mark is a red beacon on the north pier head.”
- Abort point. State it explicitly: “If we lose the leading marks or depth drops below 6 feet before the turn, we reverse course and anchor in the holding area to the southwest.”
- VHF. Confirm the working channel: “Harbor control is on Channel 16, then 12.”
- Speed. Agree on approach speed: “We hold 4 knots through the inlet.”
- Roles. Assign tasks: who steers, who calls depths, who watches for traffic.
Execution steps underway
- Confirm the first transit is visible before committing to the approach.
- Call each mark as you pass it: “Red beacon abeam to port.” The helmsman acknowledges.
- The depth watcher reads the sounder every 30 seconds and calls any drop below the pre-set threshold.
- The lookout monitors AIS and the horizon for crossing traffic, ferries, and commercial vessels.
- The navigator tracks position against the plan, not the chartplotter screen.
Handovers during pilotage
Avoid crew changes inside a pilotage area if possible. If a handover is unavoidable, the outgoing helmsman briefs the incoming one on the current leg, the next mark, the depth trend, and the abort point before stepping away. The navigator confirms the handover verbally.
What hazards and decision rules should you know before entering?
Pilotage accidents cluster around a handful of predictable scenarios. Knowing the pattern in advance lets you write a decision rule before you are in the middle of it.
Common hazards:
- Shoals and shifting sandbars. Particularly common in U.S. East Coast inlets and Gulf Coast passes where sand moves seasonally. Check the most recent NOAA survey date on your chart.
- Strong cross-currents. A 2-knot beam current on a 100-foot-wide channel can set you off track by a full boat length in under a minute at 4 knots.
- Ferry and commercial traffic. Ferries operate on fixed schedules and have limited maneuverability. Check the schedule before entry and build a gap into your timing.
- Submerged wrecks and obstructions. Marked on charts but sometimes shifted by storms. Verify against current Notices to Mariners.
- Bridge air clearance. Fixed bridges require you to know your air draft and the predicted water level at the time of transit. A tide that is 2 feet above MLLW reduces your clearance by exactly 2 feet.
Funneling effects. In a narrowing channel, current accelerates and traffic converges. A vessel that is manageable in open water becomes hard to stop or steer in a funnel. Slow down before the funnel, not inside it.
Decision rules to pre-write on your plan:
- Minimum depth margin: if depth drops below [your calculated minimum], abort immediately.
- Visibility threshold: if visibility drops below 0.5 nautical miles, hold position or return to open water.
- Traffic gap: do not enter a commercial channel without a gap of at least [X] minutes ahead of the next vessel.
- Communications: if harbor control does not respond on the working channel within three calls, switch to Channel 16 and request instructions.
Contingency options:
- Safe anchorage position (charted depth, holding ground type, distance from channel)
- Holding position outside the entrance (depth, sea room, traffic separation)
- Reverse transit back to open water (bearing, distance, time)
A copyable one-page sample pilotage plan you can print
The sample below is structured as a hybrid plan: a brief text list of fields followed by a waypoint table. Copy it, fill in your own numbers, and laminate it.
PILOTAGE PLAN — [VESSEL NAME] — [DATE]
Approach: [Name of harbor/inlet] from [sea buoy or offshore waypoint] Conditions: Wind [direction/force], visibility [nm], tidal state [rising/falling] Skipper: [Name] VHF: Ch [working channel] / Harbor control: [call sign]
Primary transit: [Front mark description] over [rear mark description] — bearing [°M] Secondary transit / clearing bearing: [Description] — bearing [°M] (keep [mark] to [port/starboard])
Abort point: [Description and position] — if reached, [action] Safe anchorage: [Name, charted depth, holding ground]
Tidal heights at reference station [name]:
Minimum depth required: [Draft] + [squat] + [safety margin] = [total] ft
Waypoint table:
Annotations for on-deck use:
- Bearing column. Magnetic bearing from the previous waypoint. Check with hand-bearing compass as you approach each turn.
- ETA check. If you are more than five minutes behind ETA at any waypoint, recalculate your tidal height before proceeding.
- Confirmation method. The method you will use to confirm you have reached the waypoint. Never rely on GPS alone.
Night vs. day adaptation. For night pilotage, replace visual mark descriptions with light characteristics (e.g., “Fl R 4s” rather than “red beacon”). Add the light’s nominal range and note which lights are obscured by headlands at your approach angle. Reduce speed by at least one knot to give yourself more time to identify lights before committing to a turn.
How do you debrief and keep your plans current?
A pilotage plan used once and filed away is a missed opportunity. The debrief takes five minutes and pays dividends on every return visit.
Post-entry debrief checklist:
- Did conditions match the forecast? Note any discrepancy in wind, visibility, or current.
- Did you deviate from the planned track? Record why and whether the deviation was safe.
- Which transits worked well and which were hard to identify?
- Were any marks off-station, missing, or different from the chart?
- Did the tidal prediction match actual depth sounder readings?
Updating your records:
- Add handwritten notes to your paper pilot book or chart folio immediately after arrival, while details are fresh.
- Update electronic waypoints in your chartplotter to reflect any corrections.
- If you find a mark that has moved, is missing, or differs significantly from the chart, submit a report to the U.S. Coast Guard via the Local Notice to Mariners feedback process. That report helps every mariner who follows you.
When to revise a saved plan:
Revise before every use if more than three months have passed, if a major storm has affected the area, or if a new Notice to Mariners covers your approach. Tidal datum updates, dredging projects, and seasonal buoy changes all affect the numbers on your plan.
Why validated real-time data makes your pilotage plan more reliable
A well-drawn pilotage plan is only as good as the data behind it. Pre-calculated tidal heights, current predictions, and depth margins all depend on the accuracy of the source.
Real-time validated data reduces the two biggest sources of uncertainty in a pilotage plan: ETA drift caused by unexpected current, and under-keel clearance errors caused by stale tidal predictions. When your tide prediction is sourced from a validated, live feed rather than a static table printed weeks ago, your depth margin calculation reflects what the water is actually doing.
Practical examples of where live data changes decisions:
- Tide confirmation. A live tide feed lets you verify that the predicted high water has not shifted by 20–30 minutes due to atmospheric pressure or storm surge, both of which NOAA’s storm surge and water level products track in real time.
- Current velocity. Predicted currents at a reference station may differ from actual conditions in a specific inlet. A validated current observation at or near your approach gives you a more accurate speed-over-ground estimate.
- Live harbor notices. Temporary depth reductions from dredging, buoy discrepancies, or port closures appear in official Notices to Mariners but are easy to miss if you rely on a static pilot book.
- Berth availability. Knowing a berth is available before you commit to the approach removes one decision from the pilotage itself.
RYA guidance is clear that multiple position-fixing techniques and a speed the navigator can “think at” are the foundation of safe pilotage. Validated data supports those techniques; it does not replace them. The eyeball, the hand-bearing compass, and the sketch map remain the primary tools once you are inside the channel.
Validated real-time marine data reduces uncertainty in ETA and depth margins, but it works alongside visual navigation, not instead of it. A live tide feed confirms your pre-calculated window; the transit confirms your track. Both are necessary.
The mistake most mariners make with pilotage plans
Most pilotage accidents do not happen because the navigator lacked information. They happen because the navigator trusted one source too completely, usually the chartplotter, and stopped looking out of the window.
The sketch map is the antidote. Spending 10 minutes drawing the approach by hand forces you to ask questions you would never ask if you simply loaded a waypoint file: Where exactly is the shoal relative to the leading mark? What does the transit look like from 0.5 miles out? Which way do I turn if the depth drops? The act of drawing is the preparation, not the product.
The second common mistake is treating the pilotage plan as a one-time document. Conditions change. A buoy that was on-station in May may be off-station in October. A sandbar that was charted at 6 feet may have shifted to 4 feet after a winter storm. The debrief and update cycle described above is not optional; it is what keeps the plan honest.
One practical preference worth stating plainly: always brief the crew before entering the pilotage area, even on a short-handed boat where the “crew” is one other person. The briefing is not a formality. It is the moment when the plan moves from paper to shared understanding, and shared understanding is what allows someone else to take the helm or call an abort if the skipper is occupied.
Nausika brings validated maritime data to your pilotage workflow
Planning a pilotage approach means trusting your numbers. Tide heights, current velocities, and local harbor notices need to be current, verified, and sourced from authoritative feeds, not from AI-generated estimates or outdated static tables.
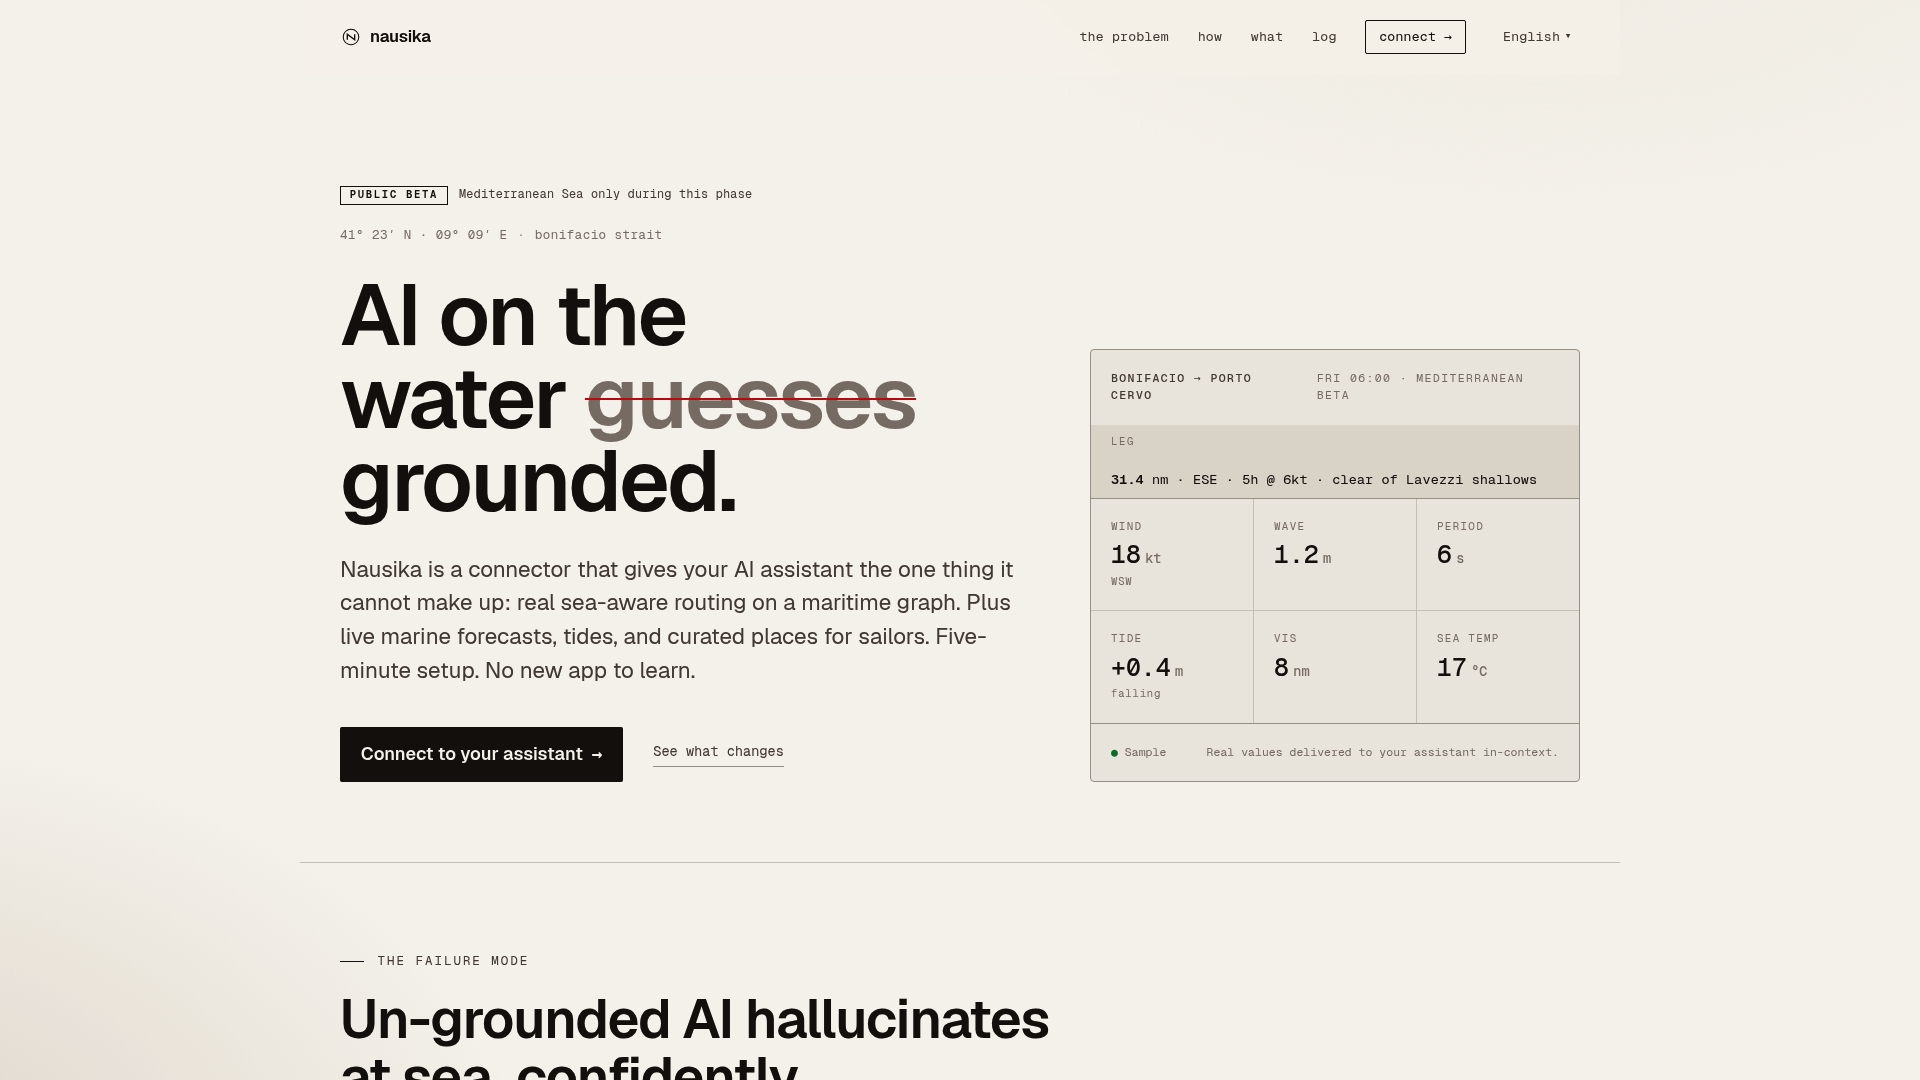
Nausika connects your existing AI assistant to validated, real-time maritime data: live tide predictions, current observations, and curated harbor information drawn from verified marine sources. When you are building the tidal window for your next approach, Nausika pulls the numbers from the same authoritative feeds your plan requires, without asking you to learn a new app or change your workflow. The result is a depth margin you can trust and an ETA calculation that reflects actual conditions.
During the current public beta, access is free. You can review planned integrations and upcoming data capabilities on the Nausika roadmap. Try it before your next coastal passage and see how much faster the tidal calculation step becomes when the data is already verified.
Sources
Use these sources every time you build a plan for U.S. waters:
- Your complete guide to yacht pilotage (done properly) - Yachting Monthly
- How to create a pilotage plan - Yachting World
- Considerations when writing a pilotage plan
- Harbour approach channels: design guidelines — PIANC