The LogProduct
Sea Breeze Planning for Coastal Sailors: A Practical Guide
Master the art of sea breeze planning with essential tips for coastal sailors. Ensure safe, efficient passages using local wind cues.
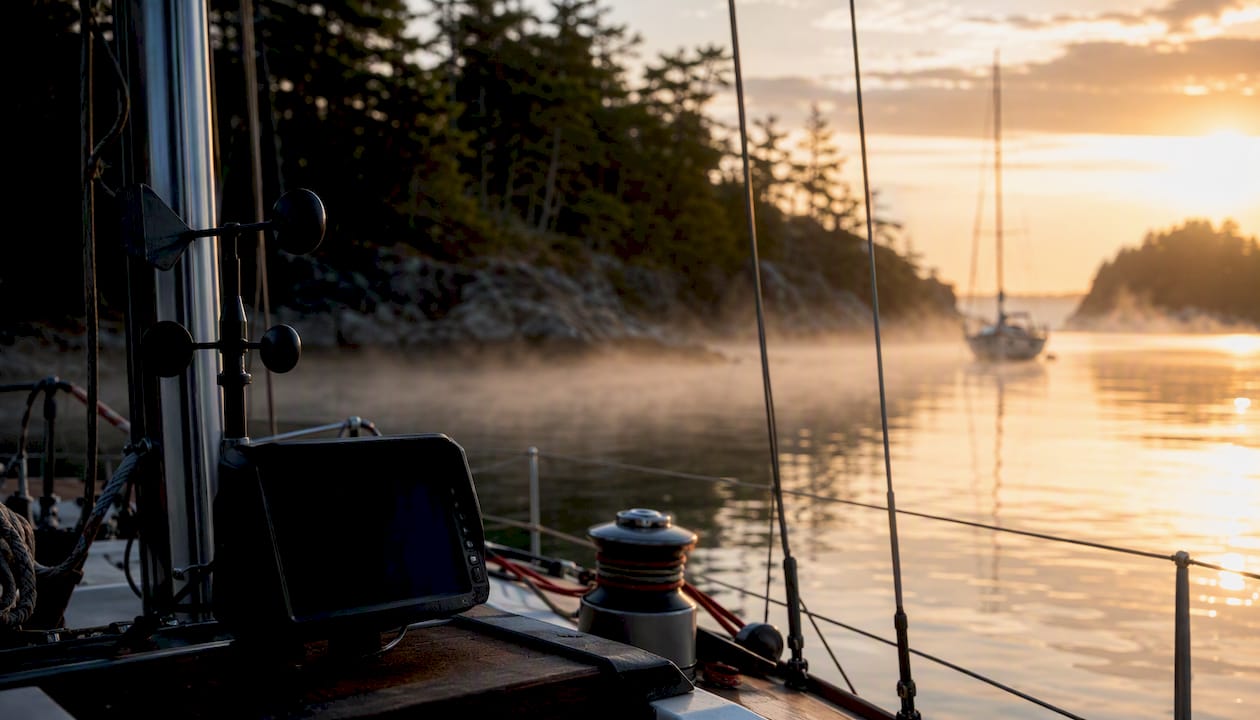
Sea-breeze-aware passage planning means identifying which thermal wind scenario you face, validating it with real-time field cues, then timing and routing your passage to stay inside the wind band. According to UBC Earth, Ocean and Atmospheric Sciences, a sea breeze typically produces an onshore wind band roughly 10–50 miles wide and peaks midday to mid-afternoon under clear, high-pressure conditions. That window is your planning target.
Before you cast off, check these four things:
- Pull the latest NOAA buoy water temperature and compare it to the nearest shore air temp (you’re looking for that ~3°F differential)
- Download a fresh GRIB snapshot and overlay it against the coastal synoptic chart
- Note the morning surface wind direction — it tells you which of the four scenarios you’re likely in
- Identify at least two shelter options along your intended track
Key Takeaways
Scenario-aware sea breeze planning, validated with real-time field cues and nearshore data, is consistently more reliable than any single broadcast forecast for U.S. coastal passages.
| Point | Details |
|---|---|
| Identify the scenario first | Classify the day as pure, corkscrew, backdoor, or synoptic from the morning gradient before routing. |
| Apply the 3-degree rule | When land air temp exceeds nearby water temp by ~3°F, sea breeze onset is likely; check NOAA buoys. |
| Validate with field cues | Confirm the forecast using cumulus lines, the dark ripple line, plume direction, and barometer trend. |
| Commit early to your track | Choose inshore or offshore before the no-wind buffer arrives; waiting in the calm zone costs time and safety margin. |
| Nausika for live data | Nausika connects validated buoy temps, wind vectors, and harbor info to your AI assistant for real-time routing decisions. |
Table of Contents
- Your 15-minute pre-departure checklist for sea breeze planning
- How to identify which sea breeze scenario you’re facing
- Field validation: confirming the forecast before you commit
- When to go inshore, offshore, delay, or commit
- How validated real-time data fits into your execution
- Safety checklist and contingency triggers
- Worked example: a 25-mile coastal passage with an expected sea breeze
- Why scenario thinking beats a single forecast
- Nausika brings validated data into your existing workflow
- Sources
Your 15-minute pre-departure checklist for sea breeze planning
Assemble data first, then brief the crew. Rushing the dock lines before you’ve confirmed the forecast is how passages go sideways.
Data to pull:
- NOAA buoy temps for the nearest offshore station (compare to shoreside air temp for the 3-degree rule — more on this below)
- Latest GRIB/GFS snapshot, downloaded within 90 minutes of departure
- Coastal synoptic chart showing the morning gradient
- Tide windows for your departure point and any planned anchorages
- Two or three harbor options with approach depths and VHF channels noted
Onboard checks:
- Barometer trend over the past three hours (rising or steady supports sea breeze development)
- Sky scan: cumulus building inland, haze offshore, or a clearing horizon all matter
- Smoke or stack plumes ashore — their drift direction tells you whether the gradient is still dominating
- Instrument calibration: wind transducer, depth sounder, GPS fix confirmed
Go/no-go decision rule: If the synoptic gradient is running stronger than 15 knots against the expected sea breeze direction, the thermal circulation will likely be suppressed or delayed. Delay departure by two to three hours and recheck.
Pro Tip: Pull the nearest NOAA buoy water temperature and compare it to the air temperature at the closest shore station. When land reads roughly 3°F (about 1–2°C) warmer than the adjacent water, US Sailing’s sea tactics guidelines identify this differential as the practical trigger for sea breeze onset. If the gap isn’t there yet, the breeze probably isn’t either.
How to identify which sea breeze scenario you’re facing
Sailing World’s sea breeze scenario framework defines four operational types based on the morning synoptic gradient. Knowing which one you’re in before you leave the dock changes every routing decision you’ll make.
| Scenario | Morning gradient | Onset behavior | Routing implication |
|---|---|---|---|
| Pure | Calm or very light | Classic midday fill, predictable timing | Go inshore early, ride the fill |
| Corkscrew | Light gradient backing | Sea breeze rotates clockwise through the day | Favor the right side of the course |
| Backdoor | Gradient opposing sea breeze | Late, weak, or suppressed onset | Delay; stay offshore on gradient wind |
| Synoptic | Strong gradient aligned with sea breeze | Amplified, early, and sustained | Commit offshore; watch for overpowering |
The pure scenario is the most forgiving. The backdoor is the one that catches sailors off guard — the gradient fights the thermal circulation, producing a no-wind buffer zone that can strand a heavy cruiser for hours.
Pro Tip: Local topography reshapes every scenario. Bays, valleys, and low inversions can channel or amplify the sea breeze well beyond what the synoptic chart suggests. San Francisco Bay is the textbook U.S. example: a low inversion forces the afternoon sea breeze through the Golden Gate at velocities that routinely surprise sailors who planned on open-coast conditions. Know your local geography before you assign a scenario.
Field validation: confirming the forecast before you commit
Models give you a probability. Your eyes and instruments give you the truth. US Sailing recommends validating model output with real-time environmental cues before committing to a sea-breeze-dependent track.
Run this five-minute check from the cockpit or dock:
- Cumulus line: A building row of cumulus clouds over the land signals thermal lifting. No cumulus by late morning in clear conditions is a warning sign.
- Dark ripple line: A visible line of disturbed water advancing from offshore marks the sea breeze front. When you can see it, the breeze is 10–20 minutes away.
- Clearing offshore: A brightening, haze-free horizon to seaward means the marine layer is lifting. That’s the sea breeze drawing in cooler, cleaner air.
- Smoke and stack plumes: Plumes drifting offshore confirm the land breeze or gradient is still dominant. Plumes bending onshore mean the thermal circulation is taking over.
- Barometer and onboard delta-T: A steady or slowly rising barometer combined with a confirmed 3°F land-to-water temperature gap is the strongest combined signal you can get without a weather station.
Pro Tip: The NOAA buoy network is your best free instrument for the 3-degree rule. Check the buoy closest to your departure point at Tidesandcurrents and compare water temperature to the nearest Automated Surface Observing System (ASOS) air temp. A gap of 3°F or more, combined with a clear sky and light gradient, means the sea breeze is likely on its way.
When to go inshore, offshore, delay, or commit
Routing decisions come down to one question: where will the wind be when you need it? The answer depends on your scenario and your boat.

The no-wind buffer between a retreating gradient and an advancing sea breeze is the single most underestimated hazard in coastal passage planning. UBC’s research on local wind circulation confirms that committing early to either the inshore or offshore track is the proven way to avoid getting stuck in it.
On timing: sea breeze onset typically runs 10 AM–noon local time, peaks 1–3 PM, and decays by 6–7 PM. Cooler sea surface temperatures push onset later; warmer SSTs pull it earlier. Tidal phase matters too — an ebbing tide over a shallow bank cools the surface water and can delay onset by 30–60 minutes.
Pro Tip: Light-displacement boats (under 8,000 lbs.) can sail into the sea breeze zone early and wait; they’ll accelerate quickly when the fill arrives. Heavy cruisers above 30,000 lbs. lose too much time in the calm buffer to make that gamble pay. If you’re heavy, commit to the gradient offshore and let the sea breeze find you.
How validated real-time data fits into your execution
GRIB files are powerful for broad pattern recognition but routinely underresolve localized phenomena like sea breezes. Combining them with synoptic charts and nearshore validated feeds is what separates a reliable coastal routing decision from a guess.
The practical workflow looks like this:
- Model layer: Download GRIB/GFS for the broad synoptic picture; identify the scenario type
- Validate layer: Run the five-minute field check (cumulus, ripple line, plume direction, delta-T)
- Confirm layer: Cross-reference with a validated nearshore data feed for buoy temps, live wind vectors, and harbor approach conditions
- Route update: Adjust track, departure time, or contingency harbor based on confirmed data
Nausika connects directly to your existing AI assistant and delivers validated, real-time marine data: live buoy temperatures, nearshore wind vectors, verified forecast updates, and curated harbor information. No new app to learn. The data comes from verified marine sources, not AI-generated content, so what you get is grounded in what the water is actually doing. See the full data provenance and contributors for source transparency.
Pro Tip: Set an alert for the no-wind buffer window — roughly 30–60 minutes before expected sea breeze onset. That’s when gradient and thermal winds are fighting each other and your speed-over-ground can drop to near zero. Knowing it’s coming lets you either accelerate through it or duck inshore before it arrives.
Safety checklist and contingency triggers
Predefine your shelters before you leave. A sea breeze that backs 30 degrees and strengthens 10 knots in 20 minutes is not unusual, and it’s not the moment to be studying a chart for the first time.
- Shelter of refuge: Mark two harbors or anchorages within reach at any point along your track, with approach depths, hazards, and VHF channels noted
- Sudden backing trigger: If the wind backs more than 20 degrees in under 15 minutes, reduce sail immediately and reassess your track
- Unexpected strengthening: If apparent wind exceeds your planned upper limit by more than 5 knots and is still building, head for the nearest shelter rather than waiting
- No-wind buffer entry: If boat speed drops below 1.5 knots and the buffer is expected, motor through rather than drifting; drifting in a shipping lane or near shoals is the real risk
- Crew roles: Assign one person to instrument monitoring, one to sail trim, and one to navigation updates during any rapid wind shift. Confusion about roles is how small problems become big ones
Local hazards deserve specific attention. Bays with narrow entrances can produce accelerated outflow during sea breeze decay. Shoal areas near inlets heat up faster than open water, which can create localized thermal cells that diverge from the forecast. When contingency harbor operations require coordinating crew ashore, having a pre-briefed shore contact saves time when conditions change fast.
Worked example: a 25-mile coastal passage with an expected sea breeze
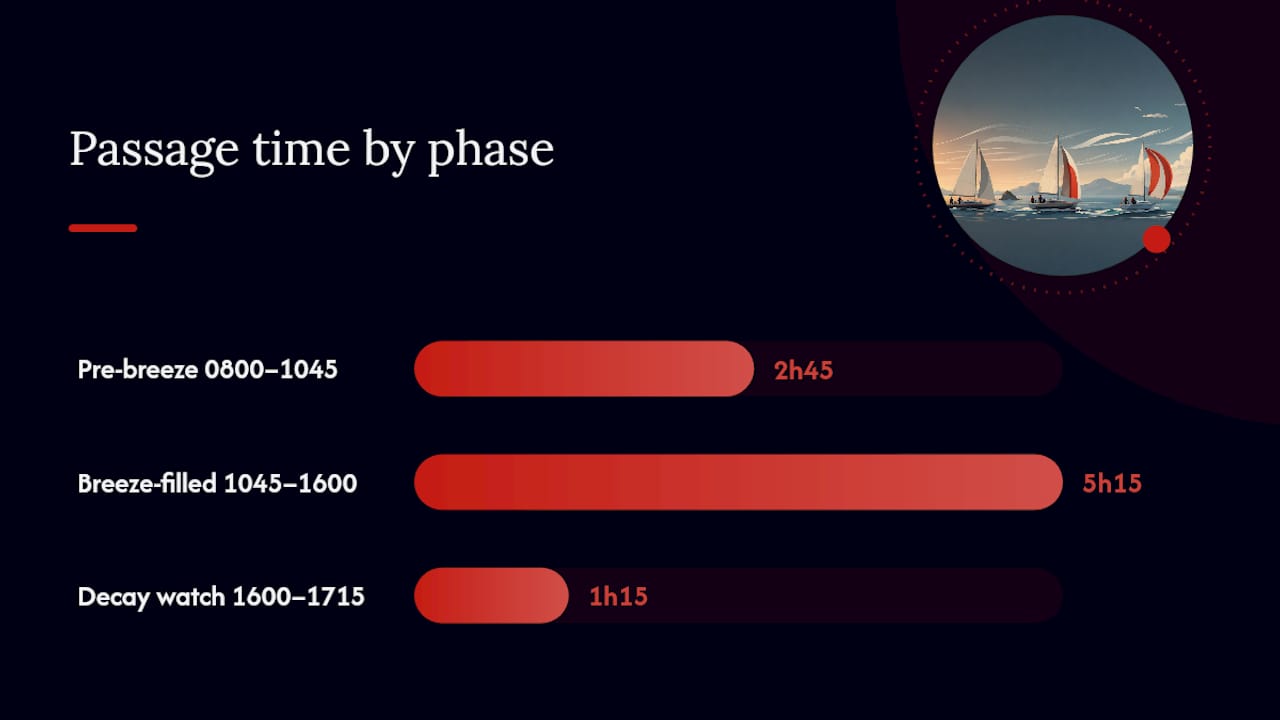
Here’s how the full workflow runs on a typical summer morning on the U.S. East Coast.
Setup: You’re departing a marina at 0800, heading 25 miles northeast along an open coast. The forecast shows a pure sea breeze scenario with onset expected around 1100.
- 0700 — Assemble data: Pull the nearest NOAA buoy (water temp: 62°F). Check the ASOS station ashore (air temp: 67°F). The 5°F gap exceeds the 3-degree rule threshold. GRIB shows light gradient from the southwest. Scenario confirmed: pure.
- 0730 — Crew brief: Assign roles. Mark two contingency harbors at miles 10 and 20. Note approach depths and VHF channels for each.
- 0800 — Depart: Head inshore of the rhumb line. Light air from the southwest. Barometer steady.
- 0930 — Field check: Cumulus building over the coastal hills. Horizon clearing offshore. No dark ripple line yet. On track.
- 1045 — Ripple line visible: Dark line advancing from the southeast, roughly two miles out. Trim for a starboard lift. Sea breeze fills at 12 knots from the SSE.
- 1300 — Peak conditions: 15 knots, steady. Stay inshore to hold the stronger thermal band. Reassess contingency harbors; conditions nominal.
- 1600 — Decay watch: Wind easing, backing slightly. Increase VMG toward destination. Arrive at 1715, well inside the decay window.
The key decision was committing inshore at departure rather than splitting the difference. That single choice put the boat in the fill zone when the breeze arrived.
Why scenario thinking beats a single forecast
Most sailors check one forecast and go. That works until it doesn’t, and on a sea-breeze day, “until it doesn’t” can mean a 20-mile drift in flat calm or a 25-knot surprise in a channel with no room to maneuver.
The approach in this guide, classifying the scenario from the morning gradient, validating with field cues, and confirming with nearshore data, is grounded in US Sailing’s observational guidelines and the physics described by UBC’s atmospheric sciences research. It’s not more work. It’s a different kind of attention: specific, sequential, and tied to what the water is actually doing rather than what a model grid cell predicted 12 hours ago.
The sailors who get caught are almost always the ones who trusted a single data source. The ones who arrive on time, with fuel in reserve and crew still smiling, are the ones who built a decision loop and ran it.
Nausika brings validated data into your existing workflow
Pulling buoy temps, checking GRIB files, and scanning harbor approaches across multiple tabs is exactly the kind of friction that leads to skipped steps. Nausika eliminates that friction by connecting validated, real-time marine data directly to the AI assistant you already use.
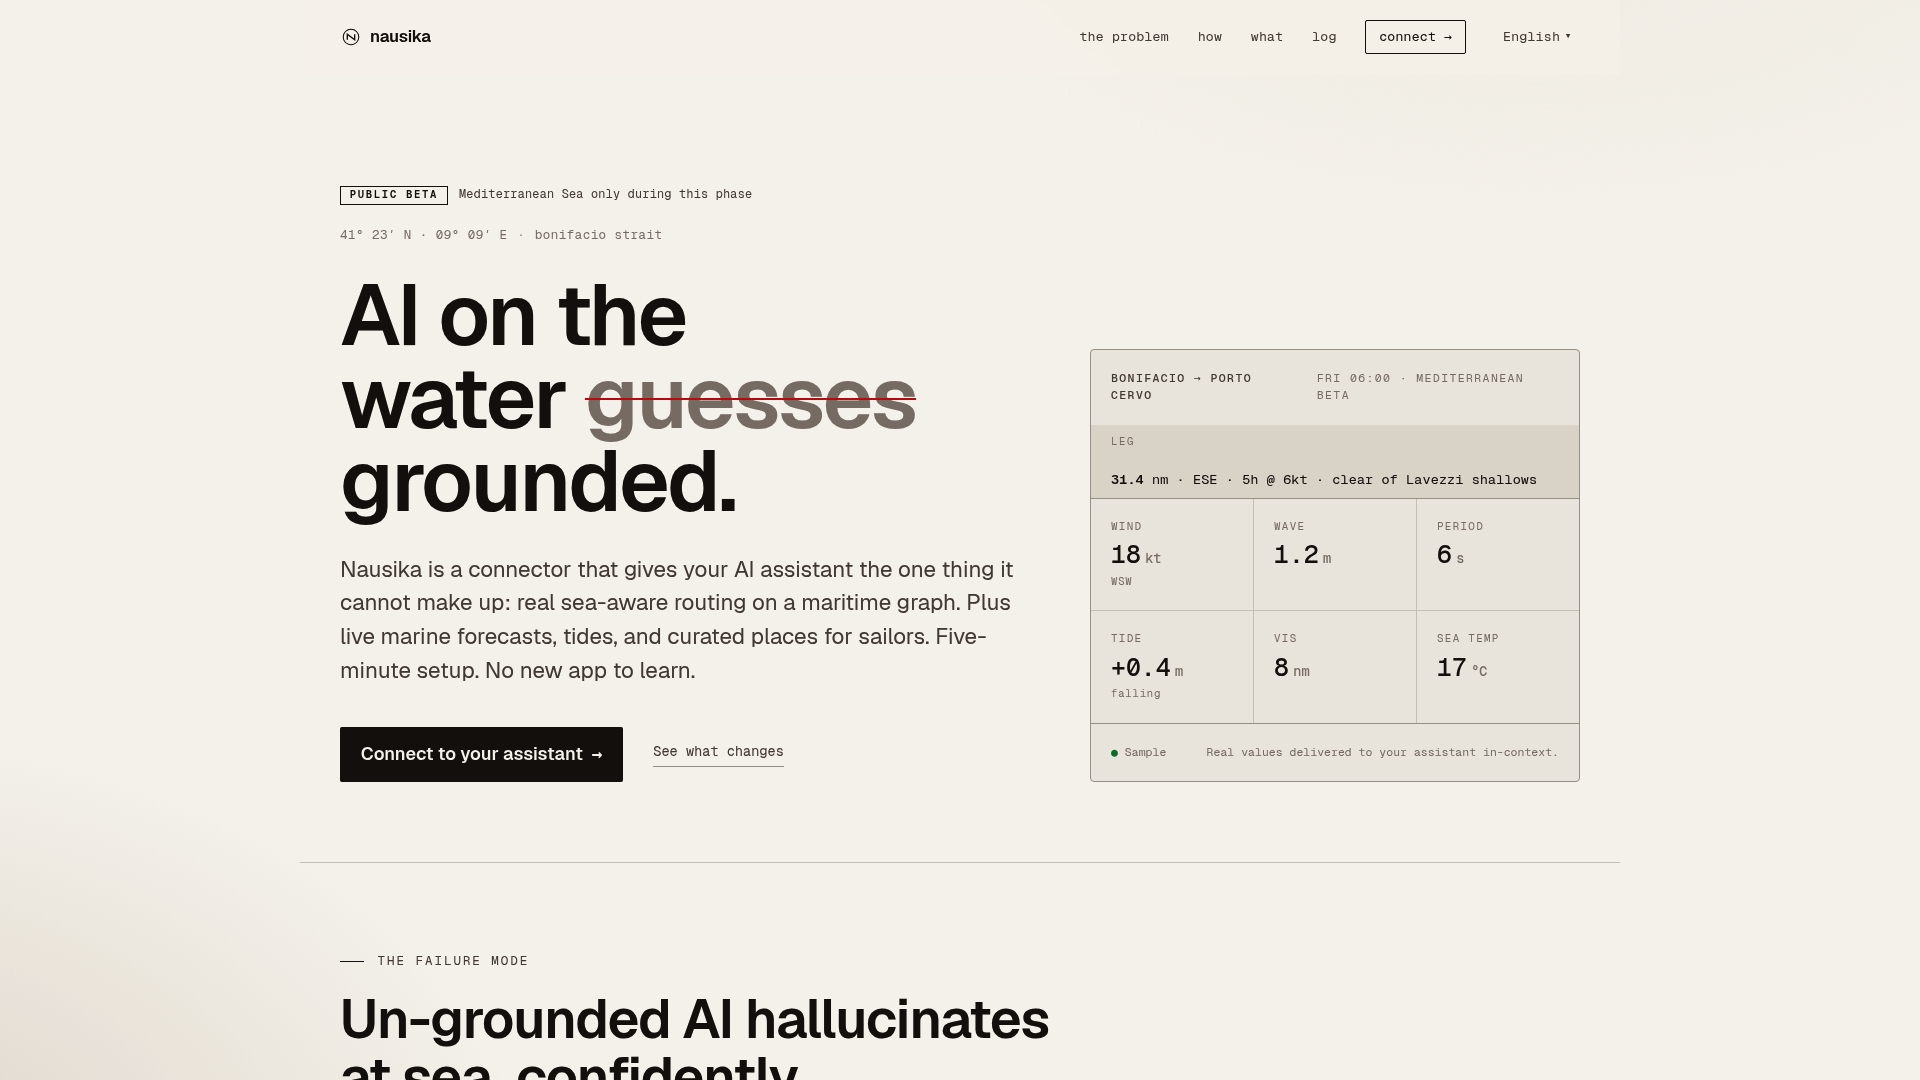
For sea-breeze-aware passages, Nausika delivers live buoy temperatures, nearshore wind vectors, verified forecast updates, and curated harbor and shelter information, all sourced from verified marine datasets rather than AI-generated content. You get the 3-degree rule check, the harbor approach data, and the routing context in one place, without learning a new interface. The public roadmap shows what’s coming next, and the credits page documents every data source behind the feed.
Nausika is currently in public beta with free access. Connect it to your AI assistant and run your next sea-breeze passage with validated data in the loop.
Sources
These are the primary references behind this guide, organized by how you’ll use them.
- Local Winds — UBC Earth, Ocean and Atmospheric Sciences
- Winning the sea breeze game | Sailing World
- Sea tactics (US Sailing)
- Using weather to dominate competition: Part 2 — sail1design